
This article was automatically translated from Japanese using AI. The Japanese version is the authoritative version.
In this post, I’ll walk through how to install DeepLabCut.
Reference sites
・Japanese-language pages
https://qiita.com/auditorycortex/items/1b3a55101cddf09553b2
↑Very clear. Following this alone should get you there.
https://note.com/sakulab/n/n9caeb32d74d6
↑Includes screenshots
・DeepLabCut homepage
・GitHub
How to install
Environment
・Windows 10
・Confirmed working on NVIDIA 2060 SUPER, NVIDIA 1080 Ti, and NVIDIA 3080
(did not work on NVIDIA 1060 SUPER)
・DeepLabCut 2.1
・Latest NVIDIA driver
・Anaconda3
・Python 3.8
・CUDA 11.8
・tensorflow-gpu 2.5
Steps
First, download the master files from the GitHub page.
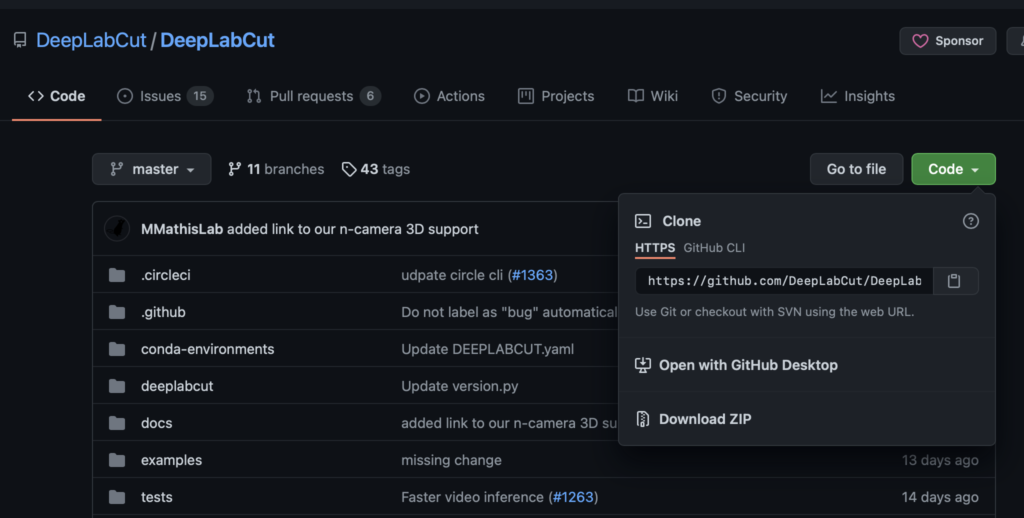
You can download it via “Download ZIP” under Code.
Next, download and install the Windows 10 64-bit version from the Anaconda site.
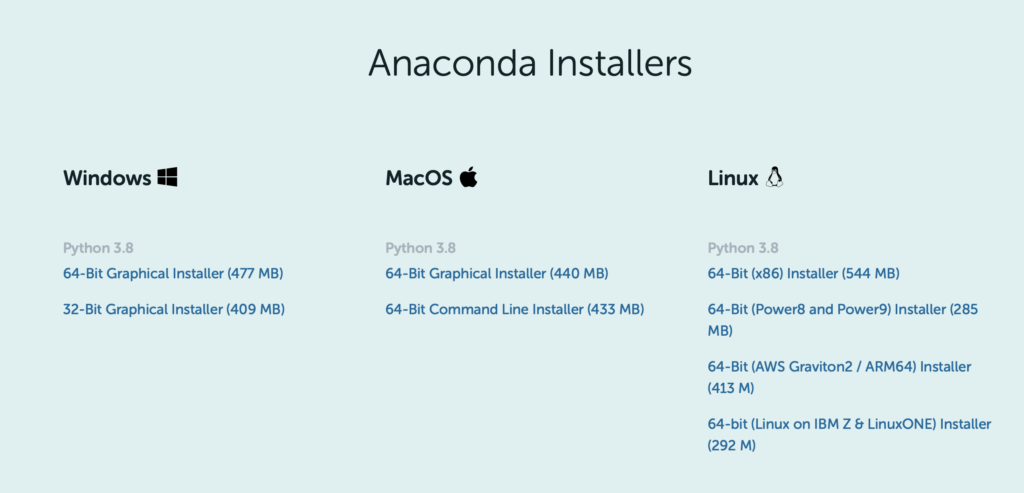
Install the NVIDIA driver. (Skip this if it is already installed.)
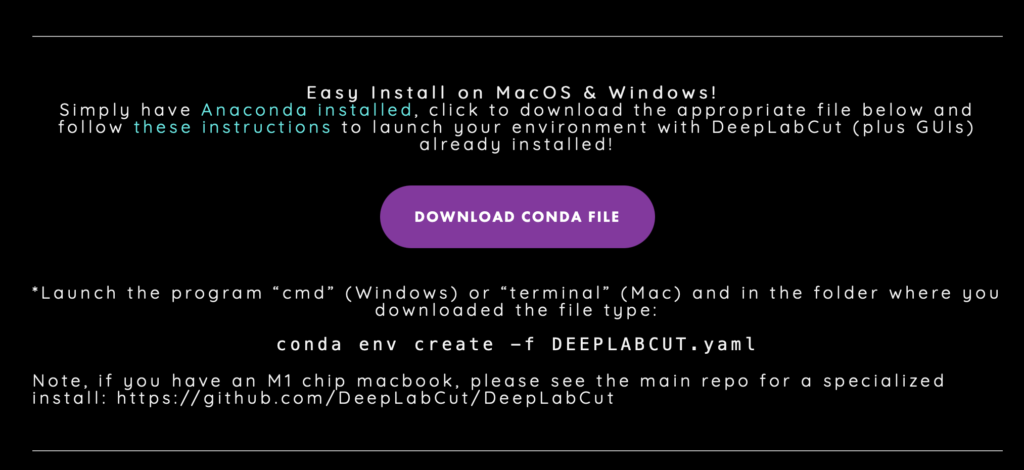
Scroll down on the DeepLabCut site, click “DOWNLOAS CONDA FILE” on the right, and
download DEEPLABCUT.yaml.
Create a DeepLabCut folder somewhere on your PC (the Desktop or a directory on the C drive is recommended), and create an environment folder inside it.
Then place the DEEPLABCUT.yaml file you just downloaded into that folder.
This is a matter of personal preference, but I like to keep environment files in one fixed place, so this is how I do it.
Launch Anaconda Prompt as administrator. (A terminal-like window full of white text on black, similar to the command prompt, will appear.)
Anaconda Prompt is installed together with Anaconda, so you should be able to find it in your list of installed applications.
Now build a virtual environment using the DEEPLABCUT.yaml file you downloaded.
In Anaconda Prompt, type
conda env create -f C:(DLC-GPU.yamlファイルの場所)DEEPLABCUT.yamland run it.
You can check the location of the DEEPLABCUT.yaml file in the file’s properties, so look it up there and enter it.
When you run this command, it will download various packages.
After that, activate the virtual environment you created.
conda activate DEEPLABCUTThe prompt should change from (base) to (DEEPLABCUT).
If you get that far, you’re good for now.
Next, install CUDA and cuDNN.
conda install -c conda-forge cudnnThis will download suitable versions of the CUDA toolkit and cuDNN for you.
Then enter the following four commands to complete the installation.
pip install numpy
pip install deeplabcut
pip install imgaug
pip install torch
Update DeepLabCut, and the installation is complete.
pip install --upgrade deeplabcutOnce you’ve made it this far, try launching it.
conda activate DEEPLABCUT
python -m deeplabcut
Entering this will launch the DeepLabCut GUI.
What to do when DeepLabCut won’t run on the GPU
Sometimes you start training and think, “Huh? Isn’t this slow?”
That’s because DeepLabCut is running on the CPU when you meant to run it on the GPU.
A common cause is a version mismatch among CUDA, cuDNN, and tensorflow.
Packages like tensorflow keep getting updated to newer versions,
so things occasionally stop working.
For the latest version information, please check DeepLabCut’s GitHub page.
That covers the installation process.
In upcoming posts, I’ll explain how to actually use it.
Bonus
For those who aren’t sure which computer to buy, I’ve started offering PC purchase consultations on Coconala!
あなたの要望に合わせてパソコンを選び、提案します パソコン選びに困っている方々へ!様々な目的に対応できます!I’ve picked out and advised on computers so often that many friends told me I should charge for it.
That inspired me to give it a try!
I’ll recommend a machine that fits both your intended use and your budget.
I have particular experience choosing and working with computers for machine learning.
And if you’d like, I can also advise you on what to look for when buying a computer in the future.
Machines I’ve helped choose so far include lab analysis workstations, everyday work computers, game-streaming rigs, laptops for incoming university students, CAD-capable machines for architecture students, and simple all-purpose computers.
I use both Mac and Windows, so I can discuss and recommend either!
Please feel free to make use of it.
Addendum 1
I’ve also written an article on how to install “SLEAP,” another behavior-tracking tool like DeepLabCut.
SLEAP is every bit as capable as DeepLabCut, so do give it a try.