Tag: インストール

  • How to Install SLEAP [Updated February 2024]

    How to Install SLEAP [Updated February 2024]

    Here I’d like to describe how to install SLEAP, a machine learning-based tool for tracking animal body parts.

    DeepLabCut is the most widely used tracking tool, and I have written about how to install it in the past, as have many other people.

    For SLEAP, however, there are currently few articles available in Japanese.
    SLEAP has many advantages over DeepLabCut, so I decided to write up the installation procedure to make it a viable option for more people.

    SLEAP’s documentation, from installation to usage, is extremely well organized and comes with videos, so anyone comfortable with English should find it easy to get started.

    The SLEAP paper is available here

    The official SLEAP website is here

    The SLEAP GitHub repository is here

    Introduction

    First of all, regarding the approach described in the official SLEAP installation guide,

    mamba create -y -n sleap -c conda-forge -c nvidia -c sleap -c anaconda sleap=1.3.3

    which sets up the environment, installs the packages, and handles everything else in a single command: I tried this on several computers, but in every case it stalled indefinitely during the environment setup and never completed successfully.

    So here I introduce an alternative installation method, also suggested by the developers.

    Installation

    We will basically follow the installation instructions on the official SLEAP website.

    Environment

    ・Windows 11 Pro
    ・Verified on an NVIDIA 3080
    ・SLEAP 1.3.3
    ・Python 3.7.12

    Downloading the files

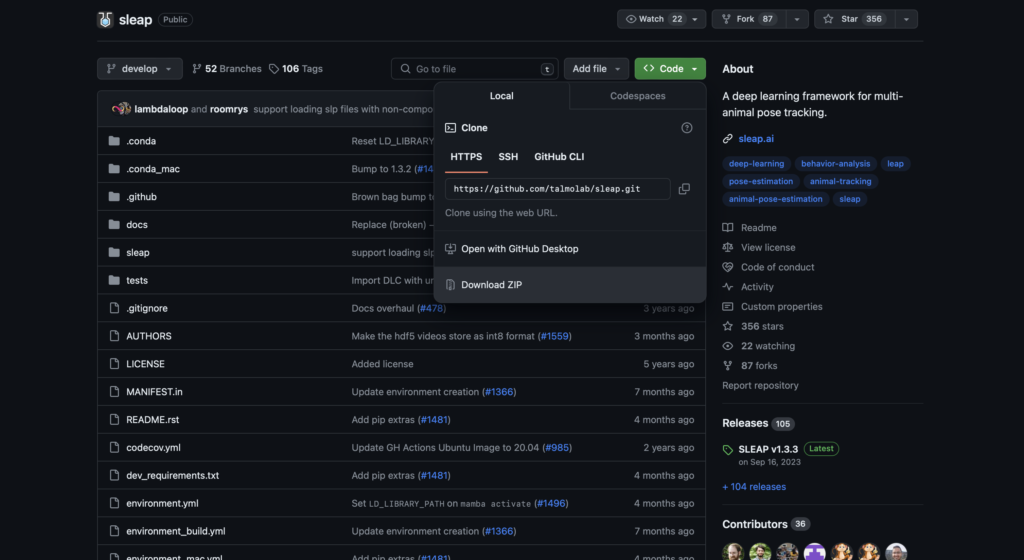
    First, download the files from the SLEAP GitHub repository to your computer.

    If you are using Git, run the following command.

    git clone https://github.com/talmolab/sleap

    If the git command is not available, either install git or download the files directly from GitHub.
    Installing the GPU driver

    Install the NVIDIA driver.
    (Skip this step if it is already installed.)

    Installing Anaconda

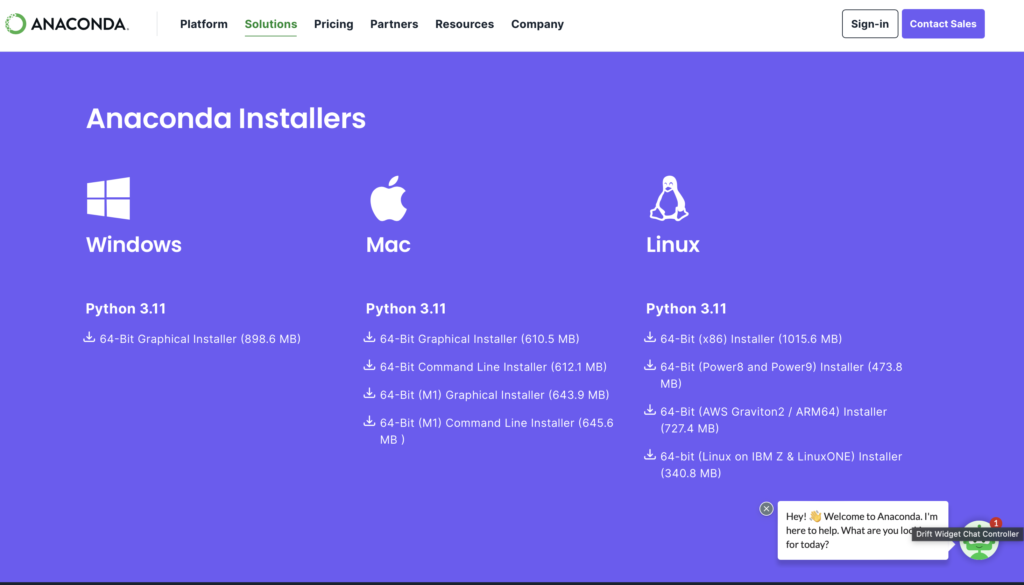
    Next, download and install the Windows 10 64-bit version from the Anaconda website.
    Click Free Download on the Anaconda site and scroll down; you should see a screen like the one below.
    Install the Windows installer on the far left.
    Once Anaconda is installed, you should find “Anaconda Prompt” in your Windows app list.
    We will use it to run the commands below to create the virtual environment, install SLEAP, and launch it.

    Creating the virtual environment and installing

    Next, run the following commands to create the virtual environment and install SLEAP.
    The environment will be named “sleap”.

    cd sleap
    conda env create -f environment.yml -n sleap

    Note that the commands above work on computers with a GPU;
    on computers without one, use the following commands instead.

    cd sleap
    conda env create -f environment_no_cuda.yml -n sleap

    That completes the installation.

    Verifying the installation

    Activate the virtual environment and launch SLEAP with sleap-label.

    conda activate sleap
    sleap-label

    You need to activate the virtual environment (the conda activate sleap command) every time you reopen Anaconda Prompt.

    After activation, the prompt should change from (base) to (sleap).

    If SLEAP launches, the installation was successful.

    Checking version information for reporting in a paper

    To check the version, activate the sleap environment and run the following command.

    python -c "import sleap; sleap.versions()"

    This will output

    SLEAP: 1.3.3
    TensorFlow: 2.7.0
    Numpy: 1.21.5
    Python: 3.7.12
    OS: Windows-10-10.0.22621-SP0

    showing the SLEAP version information and related details.

    You can also check whether SLEAP can use the GPU with

    python -c "import sleap; sleap.system_summary()"

    which should produce output like the following when the GPU is available.

    GPUs: 1/1 available
      Device: /physical_device:GPU:0
             Available: True
           Initialized: False
         Memory growth: None

    In future posts, I hope to walk through how to actually use SLEAP.

    Bonus

    For those unsure which computer to buy, I’ve started offering PC purchase consultations on Coconala!

    あなたの要望に合わせてパソコンを選び、提案します パソコン選びに困っている方々へ!様々な目的に対応できます!

    I often pick out computers and give advice on them, and many friends have told me I could make money doing PC consultations.
    That inspired me to give it a try!

    I’ll recommend a machine that fits both what you want to use it for and your budget.
    In particular, I’ve chosen and used many computers for machine learning.

    And if you’d like, I’m happy to advise you on what to look for the next time you buy a computer.

    Machines I’ve picked out so far include lab analysis computers, everyday-use computers, computers for game streaming, computers for incoming university students, computers that can run CAD for architecture students, and simple stopgap machines.

    I use both Mac and Windows, so I can talk about and recommend either one!

    Please feel free to make use of it.

  • [Updated December 2022] How to Install YOLOv5 [Object Detection Tool]

    [Updated December 2022] How to Install YOLOv5 [Object Detection Tool]

    What is YOLOv5?

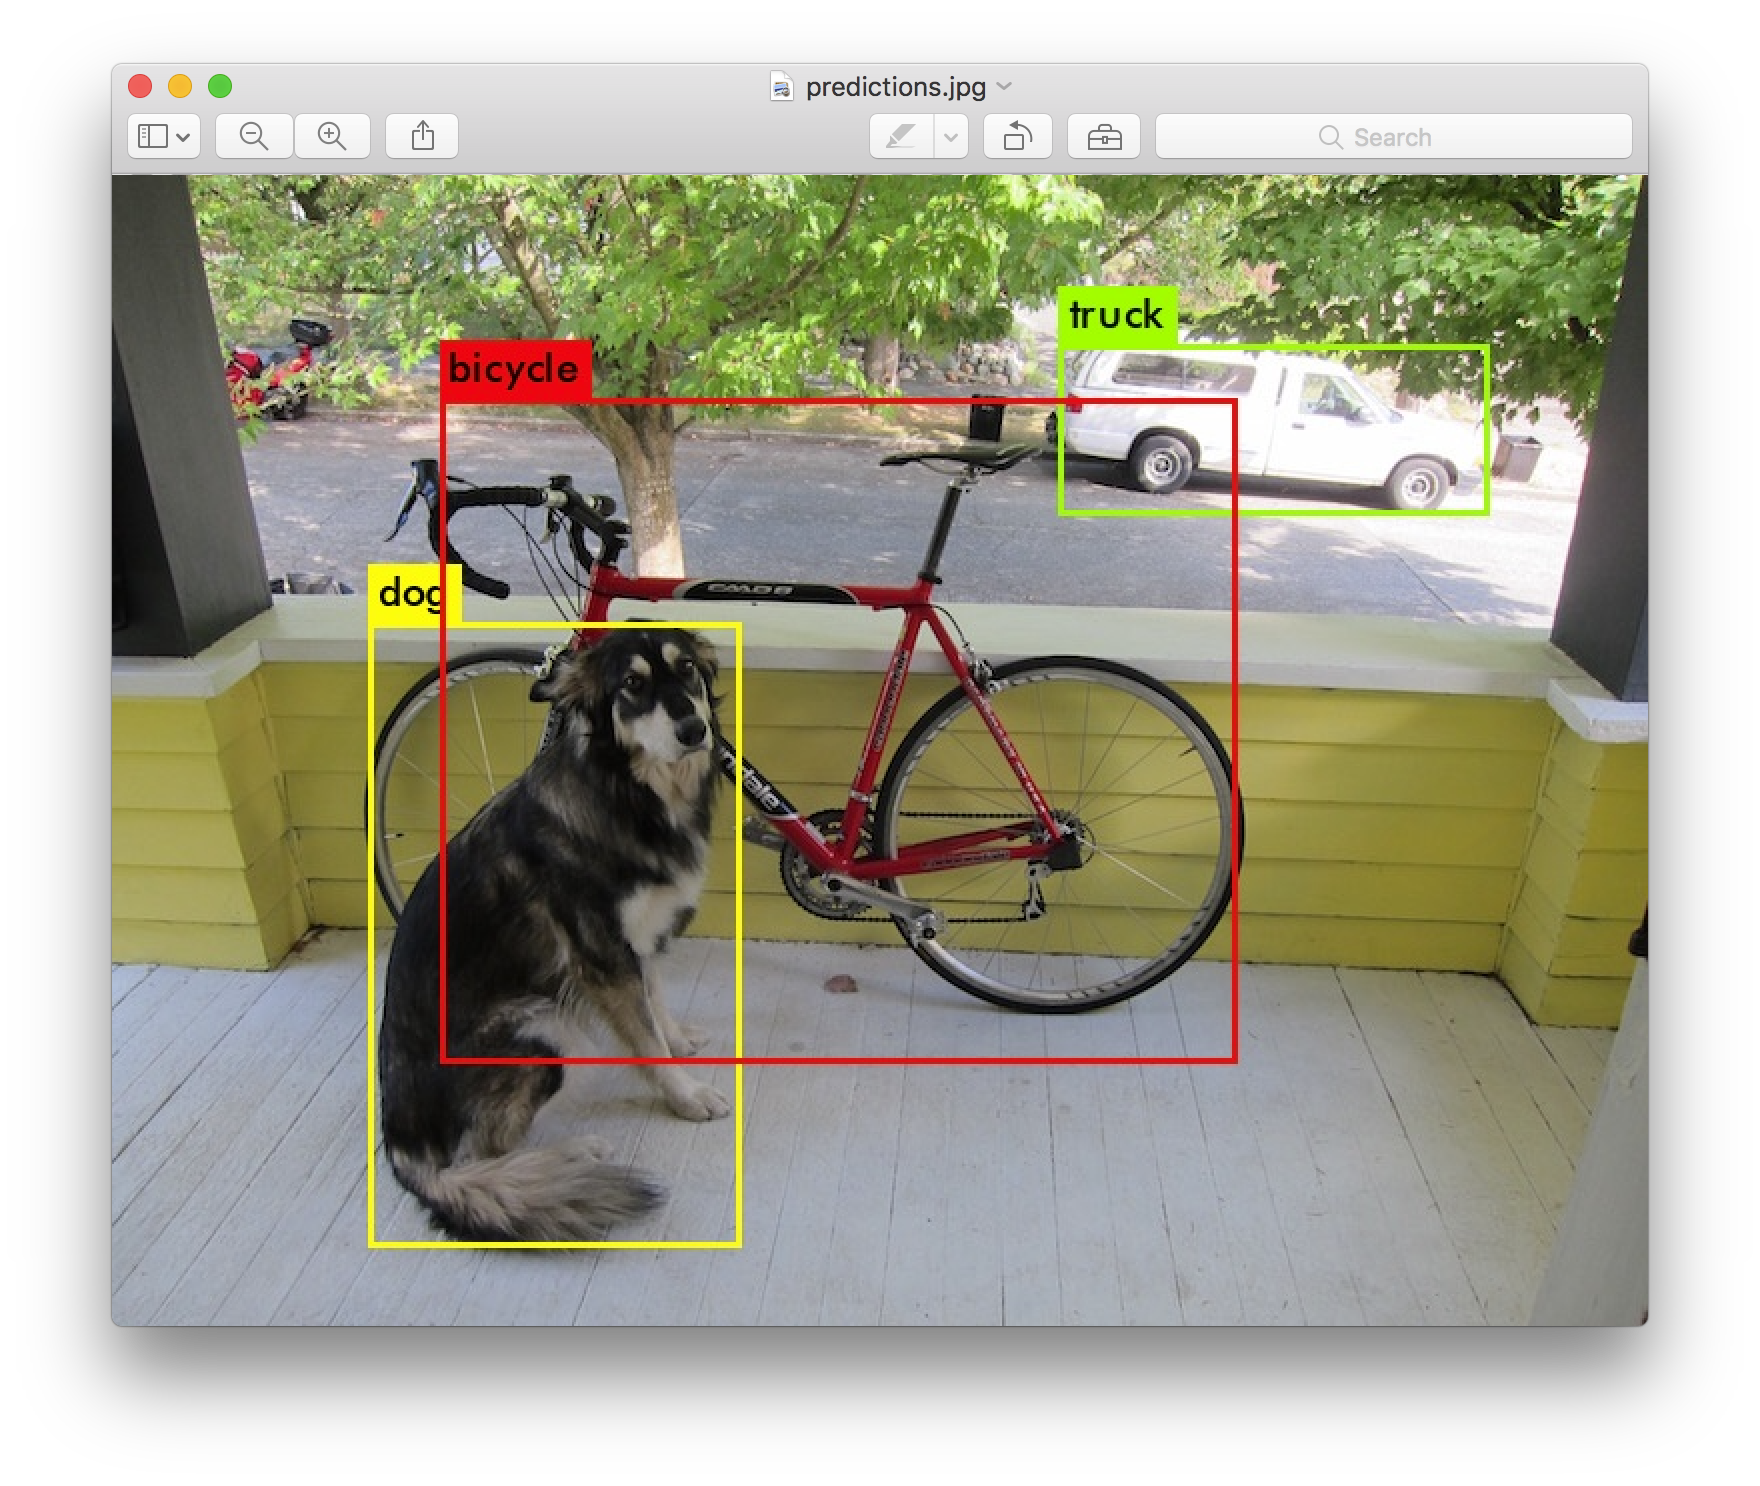
    YOLO is an object detection algorithm. The name stands for “You Only Look Once.”
    It differs somewhat from object tracking: it detects objects and identifies what they are.

    YOLOのHPより引用(https://pjreddie.com/darknet/yolo/)

    In applications such as autonomous driving, YOLO detects and classifies objects the way a human would judge them—deciding whether something is a person, a pet, or a car.

    The classification algorithm itself is complex, so I will not go into it here, but a quick search will turn up a great many sites that explain it.

    New versions of YOLO have been appearing at a pace of roughly once every two years. So far we have had YOLO v1 through YOLOv5, and in August 2021 a new version, YOLO X, was announced.
    The differences between versions involve substantial changes in the details, but as a rule accuracy improves with each new release.

    In this post I will walk through the steps for installing YOLO v5 and verifying that it works—a version that offers sufficient accuracy and, now that plenty of information is available, is easy to get up and running.

    Installation environment

    OS: Windows 10 (macOS Monterey also worked)
    Python: 3.9.7 (3.6 or later)
    CUDA: 11.3

    How to install

    Creating a virtual environment

    We will create a virtual environment using Anaconda.
    If you do not have Anaconda installed, install it first.

    Installing YOLOv5 pulls in quite a few packages, so I recommend installing it inside a virtual environment.
    You can name the environment anything you like; here we will call it “Yolov5_env”.
    Enter the following command in Anaconda Prompt.

    conda create -n Yolov5_env python=3.9

    This should create the virtual environment.
    Activate it with the following command.

    conda activate Yolov5_env

    Installing CUDA

    First, if this is your first time installing machine learning libraries and you plan to train YOLO on a GPU, install CUDA. (Training on a CPU takes an absurdly long time, so I do not recommend it.)
    CUDA can be downloaded from the official site.

    As for which CUDA version to use, I suggest checking which CUDA versions PyTorch supports and installing that version.
    PyTorch official site

    To install an older version, click Download now and then, on the screen that appears, use Archive of Previous CUDA Releases under Resources near the bottom of the page.

    The latest version may well work too, but for now, matching the version to PyTorch should let you run everything without trouble.

    To check whether it installed, on Windows open “Edit the system environment variables,” go to Advanced > Environment Variables, and
    look for a path beginning with CUDA_PATH.
    The number after the V indicates the version.

    Installing PyTorch

    Before installing, update pip.
    Activate the virtual environment in Anaconda Prompt and run the following command.

    python -m pip install --upgrade pip

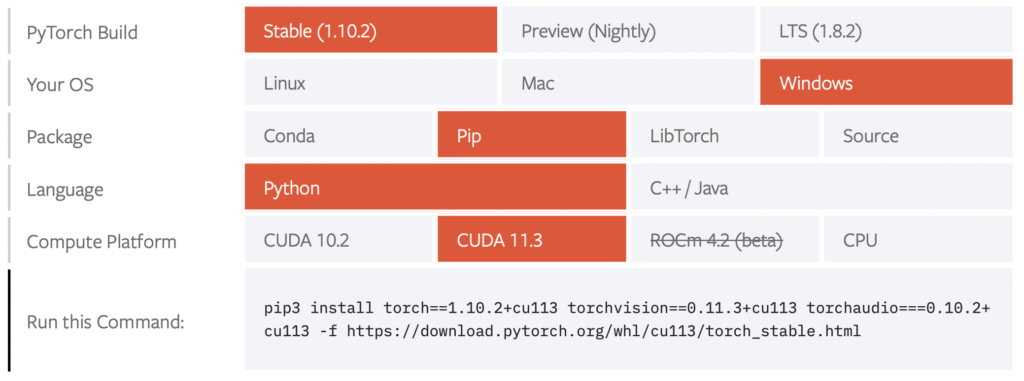
    Go to the PyTorch official site and select the installation options that match your environment.
    One thing to watch out for is the Package field: be sure to choose pip here.
    If you install with conda, you will run into errors later on.

    Copy and paste the command shown under “Run this Command” to install PyTorch in your virtual environment.

    Once the installation finishes, use the following command to check that PyTorch is installed.

    pip list

    If torch appears in the list, you are all set!
    As a quick sanity check, launch python and run the following commands.

    import torch
    print(torch.cuda.is_available())

    If the output is True, the installation succeeded and torch is ready to run on the GPU.
    (On a Mac, or on a computer without a GPU, you will see False, but as long as the import goes through you are fine.)
    If you get an error, go back and review the installation.

    Installing YOLOv5

    Download (clone) the YOLOv5 files from GitHub.

    git clone https://github.com/ultralytics/yolov5

    If you cannot use the git command, either install git or download the files from the YOLOv5 GitHub repository.

    Next, run the following command in your virtual environment in Anaconda Prompt.

    cd yolov5
    pip install -r requirements.txt

    The first command moves you into the yolov5 folder you downloaded from GitHub. If you installed it with the git command, this will work as is; if you downloaded it directly from the website, you will have to navigate to that directory yourself.

    The downloaded yolov5 folder contains a file called “requirements.txt” that lists the necessary packages. The second command opens this file in read-only mode and installs the packages listed in it.

    Once the installation is finished, let’s check which packages were installed.

    pip list 

    You will probably see that quite a few packages were installed.
    With that, the YOLOv5 installation is complete for now.

    Running it

    To check that everything works, let’s try it with the data that comes with the yolov5 folder.
    Open Anaconda Prompt, activate the virtual environment, and use the cd command to move into the yolov5 folder.

    Then run the following command.

    python detect.py --source ./data/images/ --weights yolov5s.pt --conf 0.4

    detect.py is the program that performs object detection using YOLO.
    With source you specify the path to the folder containing the material you want to run detection on.
    Here I used the images included in yolov5.

    With weights you choose which model to use.
    Here we use yolov5.pt.

    conf sets the likelihood threshold at which an object is recognized.
    This is a term you will run into often when studying machine learning.
    If you are not sure, leaving it as is should be fine.

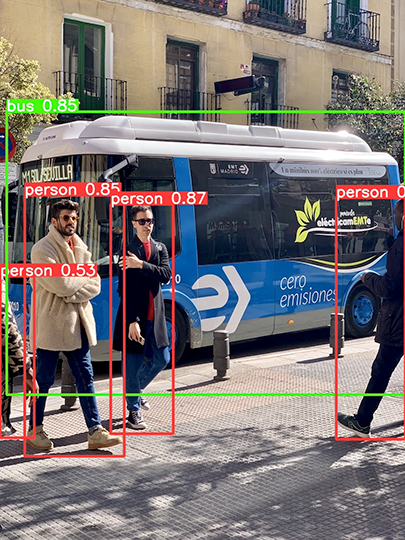
    After running it, you should find the annotated images in runsdetectexp inside the yolov5 folder.
    This is how object detection is done in YOLOv5.

    Errors I ran into

    ModuleNotFoundError: No module named ‘torch’

    You may see this error when trying to run YOLO.
    It means PyTorch is not available, i.e., the module cannot be found.

    If you get this error, first check whether torch is installed in your virtual environment.

    pip list

    If torch is not listed, install PyTorch.
    If it is there but things still don’t work and you’re not sure why, start Python, import PyTorch, and check whether it is usable.

    import torch
    torch.cuda.is_acailable()

    If it is available, True will be returned; if not, you will likely see the error above.

    One possible cause of the error is that PyTorch was installed with the conda command.
    If PyTorch is installed via conda while the other packages are installed via pip, the error above can occur.

    In that case, uninstall torch with the conda command and reinstall it with pip.

    “Module not found” problems often arise when you have mixed up pip and conda when installing.
    Here I have used pip throughout, but it’s a good idea to always keep track of which command you used to install something.

    Links

    Anaconda
    CUDA
    PyTorch
    YOLOv5 GitHub
    YOLO homepage

    Bonus

    For those who aren’t sure which computer to buy, I’ve decided to offer PC purchase consultations on Coconala!

    あなたの要望に合わせてパソコンを選び、提案します パソコン選びに困っている方々へ!様々な目的に対応できます!

    I often pick out computers and give advice about them, and many friends have told me I could make money doing PC consultations.
    Inspired by that, I figured I’d give it a try!

    I’ll suggest a purchase that fits how you plan to use the computer and your budget.
    In particular, I’ve chosen and used many computers for machine learning.

    And if you’d like, I’m happy to also advise you on what to look for when buying a computer in the future.

    Computers I’ve picked out so far include analysis machines for the lab, everyday-use machines, PCs for game streaming, PCs for incoming university students, PCs capable of running CAD for architecture students, and simple stopgap machines.

    I use both Mac and Windows, so I can discuss and recommend either!

    Please give it a try!

  • How to Install DeepLabCut 2.3 [Updated December 2023]

    How to Install DeepLabCut 2.3 [Updated December 2023]

    In this post, I’ll walk through how to install DeepLabCut.

    Reference sites
    ・Japanese-language pages
    https://qiita.com/auditorycortex/items/1b3a55101cddf09553b2
    ↑Very clear. Following this alone should get you there.

    https://note.com/sakulab/n/n9caeb32d74d6
    ↑Includes screenshots

    DeepLabCut homepage
    GitHub

    How to install

    Environment
    ・Windows 10
    ・Confirmed working on NVIDIA 2060 SUPER, NVIDIA 1080 Ti, and NVIDIA 3080
    (did not work on NVIDIA 1060 SUPER)
    ・DeepLabCut 2.1
    ・Latest NVIDIA driver
    ・Anaconda3
    ・Python 3.8
    ・CUDA 11.8
    ・tensorflow-gpu 2.5

    Steps
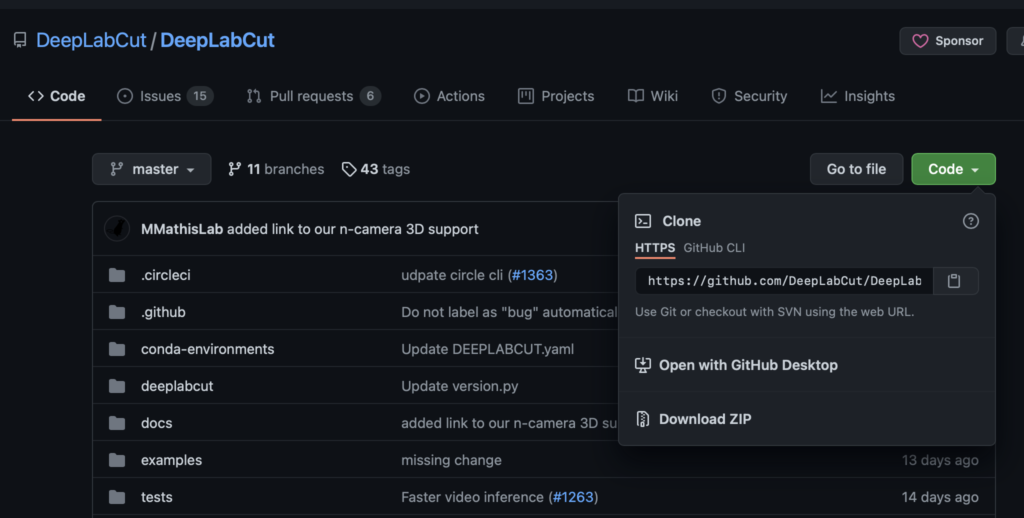
    First, download the master files from the GitHub page.

    You can download it via “Download ZIP” under Code.

    Next, download and install the Windows 10 64-bit version from the Anaconda site.

    Install the NVIDIA driver. (Skip this if it is already installed.)

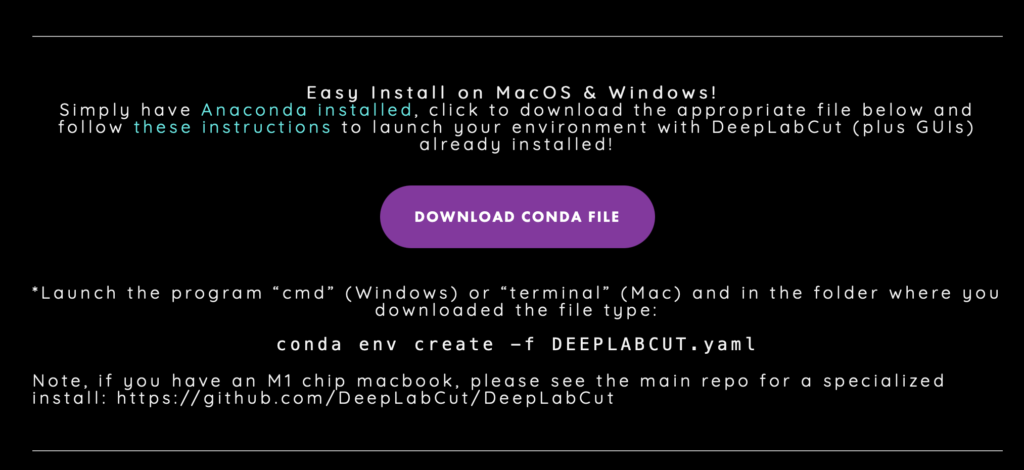
    Scroll down on the DeepLabCut site, click “DOWNLOAS CONDA FILE” on the right, and
    download DEEPLABCUT.yaml.

    Create a DeepLabCut folder somewhere on your PC (the Desktop or a directory on the C drive is recommended), and create an environment folder inside it.
    Then place the DEEPLABCUT.yaml file you just downloaded into that folder.
    This is a matter of personal preference, but I like to keep environment files in one fixed place, so this is how I do it.

    Launch Anaconda Prompt as administrator. (A terminal-like window full of white text on black, similar to the command prompt, will appear.)
    Anaconda Prompt is installed together with Anaconda, so you should be able to find it in your list of installed applications.

    Now build a virtual environment using the DEEPLABCUT.yaml file you downloaded.
    In Anaconda Prompt, type

    conda env create -f C:(DLC-GPU.yamlファイルの場所)DEEPLABCUT.yaml

    and run it.
    You can check the location of the DEEPLABCUT.yaml file in the file’s properties, so look it up there and enter it.

    When you run this command, it will download various packages.
    After that, activate the virtual environment you created.

    conda activate DEEPLABCUT

    The prompt should change from (base) to (DEEPLABCUT).
    If you get that far, you’re good for now.

    Next, install CUDA and cuDNN.

    conda install -c conda-forge cudnn

    This will download suitable versions of the CUDA toolkit and cuDNN for you.

    Then enter the following four commands to complete the installation.

    pip install numpy
    pip install deeplabcut
    pip install imgaug
    pip install torch

    Update DeepLabCut, and the installation is complete.

    pip install --upgrade deeplabcut

    Once you’ve made it this far, try launching it.

    conda activate DEEPLABCUT
    python -m deeplabcut

    Entering this will launch the DeepLabCut GUI.

    What to do when DeepLabCut won’t run on the GPU

    Sometimes you start training and think, “Huh? Isn’t this slow?”
    That’s because DeepLabCut is running on the CPU when you meant to run it on the GPU.

    A common cause is a version mismatch among CUDA, cuDNN, and tensorflow.

    Packages like tensorflow keep getting updated to newer versions,
    so things occasionally stop working.

    For the latest version information, please check DeepLabCut’s GitHub page.

    That covers the installation process.
    In upcoming posts, I’ll explain how to actually use it.

    Bonus

    For those who aren’t sure which computer to buy, I’ve started offering PC purchase consultations on Coconala!

    あなたの要望に合わせてパソコンを選び、提案します パソコン選びに困っている方々へ!様々な目的に対応できます!

    I’ve picked out and advised on computers so often that many friends told me I should charge for it.
    That inspired me to give it a try!

    I’ll recommend a machine that fits both your intended use and your budget.
    I have particular experience choosing and working with computers for machine learning.

    And if you’d like, I can also advise you on what to look for when buying a computer in the future.

    Machines I’ve helped choose so far include lab analysis workstations, everyday work computers, game-streaming rigs, laptops for incoming university students, CAD-capable machines for architecture students, and simple all-purpose computers.

    I use both Mac and Windows, so I can discuss and recommend either!

    Please feel free to make use of it.

    Addendum 1

    I’ve also written an article on how to install “SLEAP,” another behavior-tracking tool like DeepLabCut.

    SLEAP is every bit as capable as DeepLabCut, so do give it a try.