Author: 山ノ内 勇斗

  • SONY or Panasonic for a vlog camera? A thorough comparison

    SONY or Panasonic for a vlog camera? A thorough comparison

    The word “Vlog” has become widely familiar, and it will likely keep spreading.
    Riding that wave, I decided I wanted to try making Vlogs myself, so I made up my mind to buy a new camera.

    One camera currently on the market built specifically for Vlogging is the
    Sony VLOGCAM ZV-1

    Panasonic DC-G100

    .
    Unlike a handheld camcorder, it is relatively compact and can be shot with one hand, and it makes it easy to capture advanced footage such as beautifully blurred backgrounds.

    The two cameras listed above are in almost the same price range, and both have more than enough features for Vlogging.
    Precisely for that reason, it is really hard to decide which one to buy.
    So let me compare the two and list their strengths and weaknesses.

    Sony VLOGCAM ZV-1

    Strong points

    ・A variety of video modes (you can switch instantly between product reviews, scenery, faces, etc.)
    ・Light (about 294 g)
    ・Two color options (the white one is cute…)
    ・Plenty of controls on the tripod grip
    ・Comes with a fluffy mic windscreen
    ・Wide zoom range
    ・Connects to the tripod without a cable, and the tripod buttons work
    ・Simple to operate

    Weak points

    ・Still photography isn’t the focus, so I wouldn’t expect much there
    ・No viewfinder
    ・Apparently it can overheat and shut down

    Panasonic DC-G100

    Strong points

    ・It’s a mirrorless camera, so you can swap lenses
    ・Solid photo features too (a good pick even for someone just getting into photography)
    ・The microphone is amazing!
    ・The screen is beautiful!
    ・The edge of the screen turns red while recording, so it’s easy to tell you’re rolling
    ・It has a viewfinder

    Weak points

    ・Heavier than the Sony
    ・The kit lens barely zooms
    ・There’s a cable between the tripod and the camera

    What defines the Sony VLOGCAM ZV-1:
    it’s easy to operate, so anyone can start Vlogging!
    A camera built purely for Vlogging!

    What defines the Panasonic DC-G100:
    an outstanding microphone for serious video work,
    plus more than enough photo capability

    What both cameras share is a full set of Vlogging features: image stabilization, eye autofocus, smartphone connectivity, 4K recording, and so on.
    Both were designed for people shooting Vlogs, so I don’t think you’d regret either choice.
    It really comes down to what extra capabilities you’re after.

    If you’re committed to Vlogging, or your Vlogs center on people, Sony’s VLOGCAM is a very strong choice.

    If you want to shoot stills as well as video, I’d go with Panasonic’s G100.

    That said, I normally shoot photos with a DSLR, and it’s a Canon, so the lenses aren’t compatible.
    That means with the Panasonic I’d have to buy new lenses whenever I wanted a different angle of view…

    How far can I really push the Panasonic’s photo features?
    That feels like it will be my deciding factor.
    Depending on how it goes, I might just switch from Canon to Panasonic… haha

    After that, all that’s left is to see and handle them in person at the store and go with my gut!

    I hope this is helpful to you all.

    Links
    Sony VLOGCAM ZV-1
    Panasonic DC-G100

  • I Want to Control Arduino with Python!

    I Want to Control Arduino with Python!

    Arduino is controlled using the Arduino language.
    Sooner or later, however, you will want to do something more complex, or to control an Arduino together with another program.

    The module introduced here, pySerial, lets you carry out serial communication with a Raspberry Pi or an Arduino.
    Through serial communication, you can send commands from a Python program to an Arduino or Raspberry Pi and control them from Python.

    Here I introduce the basic program for doing this.
    Just being able to use it will greatly expand what you can do with your programs.

    Installation

    pip install pyserial

    You can install it by opening Python in a terminal or command prompt.
    Alternatively, you can install it from a terminal in an IDE such as PyCharm.

    Example program

    This example turns an LED on and off at one-second intervals.
    I will test it by driving pin 13, which is connected to the LED built into the Arduino.
    The Python program looks like this:

    import serial, time
    
    def main():
        #  COMポートを開く
        print("Open Port")
        ser = serial.Serial("COM3", 9600)
        while True:
            #  LED点灯
            ser.write(b"1")
            time.sleep(1)
            #  LED消灯
            ser.write(b"0")
            time.sleep(1)
    
        print("Close Port")
        ser.close()
    
    if __name__ == '__main__':
        main()

    Use serial.Serial to specify the port and the serial communication settings.
    For the Arduino UNO, specify 9600.
    This differs from board to board, so check it in the Arduino IDE.

    The b in b”1″ plays a crucial role.
    With the serial.write() function, numbers and strings must be converted to byte sequences before they can be sent over serial communication.
    The b prefix is needed to indicate that the value is a byte sequence.

    Since this program is an infinite loop, the LED keeps switching on and off every second until you stop the program.

    Next is the program on the Arduino side.

    void setup() {
      Serial.begin(9600);
      pinMode(13, OUTPUT);
      digitalWrite(13, LOW);  //  初期化
    }
    
    void loop() {
      byte var;
      var = Serial.read();
      switch(var){
        case '0':
          digitalWrite(13, LOW);
          break;
        case '1':
          digitalWrite(13, HIGH);
          break;
        default:
          break;
      }
    }

    Here I use a switch-case statement.
    It makes the program easier to follow.
    For details, take a look at my previous blog post.

    In this program, sending 0 sets the pin LOW and sending 1 sets it HIGH.
    Using this program as a base, you can control an Arduino from a Python program in all sorts of ways.

  • The switch-case statement in the Arduino language

    The switch-case statement in the Arduino language

    When you want to branch on various conditions in Arduino, you probably write almost everything with if statements.
    But what should you do when you have 10 or 20 branches (unlikely as that may be)?

    C/C++ has a switch statement, and since the Arduino language is based on C/C++, you can use the same syntax.

    Here is an example program.

    switch (var) {
      case 1:
        // varが1のときに実行する処理
        break;
      case 2:
        // varが1のときに実行する処理
        break;
      default: 
        // どのcaseラベルにも一致しないときに実行する処理
        // defaultは、省略可能
      }

    Here var is a variable: when var is 1, the code in case 1 runs.
    When var is 2, the code in case 2 runs.
    When var is anything other than 1 or 2, the default code runs.

    The “break;” after the code in case 1 and case 2 indicates that the processing for that case has finished.
    Without it, you can run into errors.

    The reason break; is not needed in the default block is that default is the last branch, so it is obvious that it is the final block of code.
    That said, there is no rule against writing it—the program works fine either way.

    You can also omit default: itself.
    It feels much like omitting the else in an if-else statement.

    Personally, I find switch-case statements look tidier than if statements when you read the code.
    It is not particularly difficult code, so give it a try.

  • From a Talk People Sit Through to a Talk People Listen To!

    From a Talk People Sit Through to a Talk People Listen To!

    One thing you can’t avoid in university life is giving presentations.
    Not only in classes, but also in the lab, in seminars, and in club activities, there are many occasions when you have to stand up in front of people and present.

    From elementary school through high school, you mostly just sit and listen in class, and there are few chances to give a long presentation. Yet
    the moment you enter university, you are suddenly put in front of an audience again and again.

    That said, it’s also true that many people around you dislike presenting or feel they’re bad at it,
    and unfortunately there are plenty of presentations that leave the audience thinking “that was poorly done” or “that was boring.”

    So I’m going to keep posting the presentation know-how I’ve picked up during my university years.

    This time, the topic is the mindset behind giving a presentation.

    A typical trait of poor presenters is that they give a talk that the audience is made to sit through.
    For example:
    ・spending too long on a single slide
    ・leaving dead air during the talk
    ・using too many slides
    ・failing to make the connections between points clear
    and so on.

    As a rule, you should assume that the people listening have almost no motivation to listen to your talk.
    Nobody starts out interested in your presentation.

    The audience feels the way you did in middle school, sitting in the gym listening to a 30-minute speech from the principal.
    Few of us listened to those speeches with genuine curiosity every time.

    If you give a self-centered talk to an audience with no desire to listen, you may come away satisfied, but the audience will be bored.

    Some people, seeing that the audience looks unengaged, is checking their phones, or has dozed off, will fall into self-loathing and conclude that their presentation is hopeless.

    To avoid that, you need to give a talk that people actually want to listen to.

    Presentation technique matters, but what matters most for a talk people want to hear is how you yourself think about presenting.
    Once that mindset changes, your talk will naturally become audience-oriented.

    The key points for a talk people want to hear are:
    ・be clear about the single most important message of your talk
    ・keep the talk simple and minimal
    ・eliminate anything that even you find confusing or distracting
    That’s it.

    Suppose your talk contains ten points.
    If you deliver all ten with the same emphasis, the audience will retain nothing at all; but if you present just one as clearly important, the other nine may amount to zero while that one point will at least stick in their minds.

    Narrow down what you want to say, keep it short and to the point, and make it easy to follow

    Aim for a talk that people listen to naturally, rather than one that forces your views on them.
    If you keep that in mind, your presentations will improve on their own.

    If you know someone who is a good presenter, ask them all sorts of questions.
    If you don’t, watch the talks that are so often held up as models—Steve Jobs, President Obama, and the like.
    They can reach a huge number of people with words alone.
    Their technique is impressive, but above all, they are perfectly clear about what they want to convey.

  • Batch Image Processing with ImageJ (Fiji)

    In biological research, you will often image samples such as antibody-stained preparations with a confocal laser scanning microscope.

    Here I explain how to use ImageJ to turn that imaging data into a stack image (Stack) and to merge images acquired at different wavelengths into a merged image (Merge).
    I will finish by showing how to add a scale bar.

    First, with a confocal laser scanning microscope you obtain images acquired at different wavelengths (different lasers) for each single slice, and these slices span the thickness of the sample along the z axis.

    Here, combining images of different wavelengths taken at the same z position is called merging, and superimposing the images along the z axis is called stacking.
    ImageJ uses these terms in the same sense, so keep in mind what you actually want to do as you work.

    I will use Fiji in this explanation, but the procedure is largely the same in ImageJ.
    That said, Fiji can open confocal microscope image data without any format conversion, which is why I use Fiji here.

    For this example I used a confocal microscope image of a fly from flylight.
    The image used as an example

    As you can see from the files downloadable at that site, confocal microscope images use manufacturer-specific formats such as *.lsm, and these files contain a variety of information.
    Scale information is included as well, so you can insert an accurate scale bar without having to look up the microscope’s scale yourself.

    First, open Fiji and drag your imaging data onto the menu bar–like window that appears.

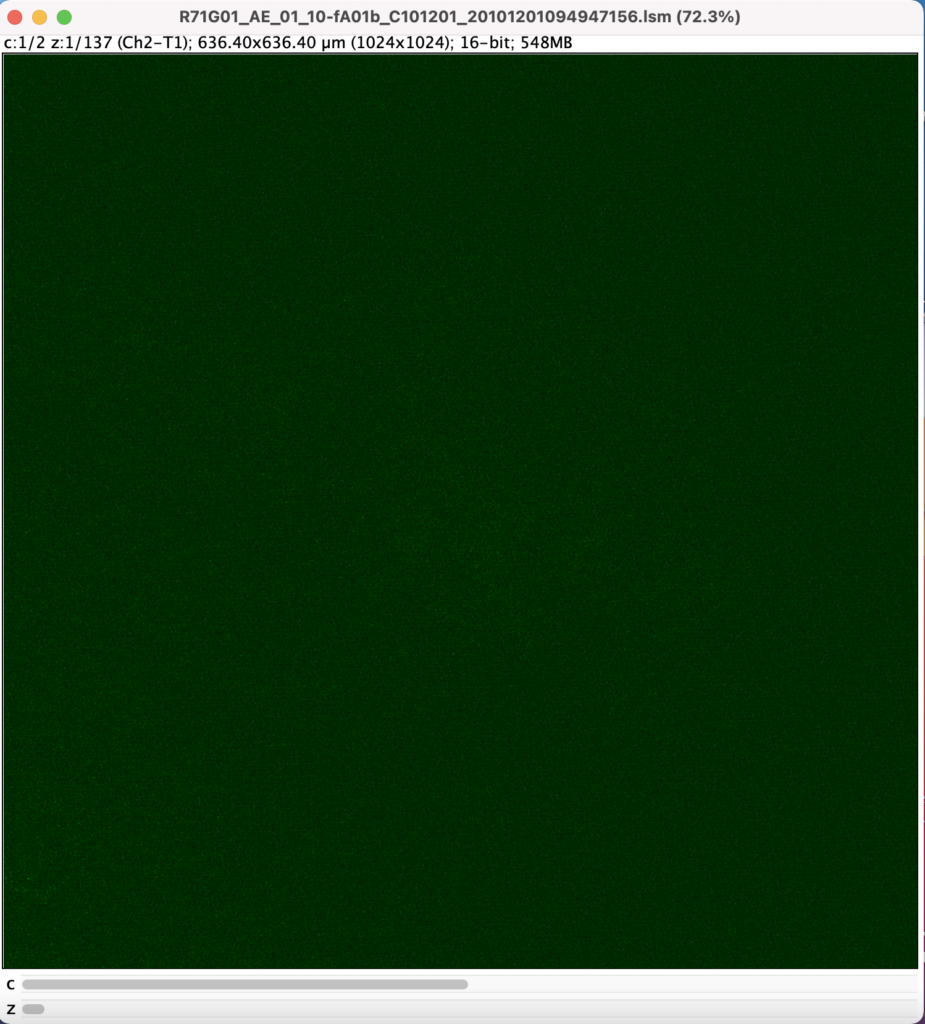
    When it opens, a new window appears showing something blackish or greenish.
    This is the image you are currently working on.
    You can move along the z axis by dragging the scroll bar at the bottom.

    Merge the images via Image<Color<Make Composite in the top menu.
    Then open the Channels Tool via Image<Color<Channels Tool.

    In the Channels Tool, you can toggle the display of each channel using the Channel checkboxes.

    To stack the images, click Image<Stacks<Z project and the images will be stacked.
    Unless you have a particular preference, set Projection Type to Sum Slices.
    A new window will then open showing the stacked image.

    The Channels Tool works here too, so you can view the stacked image for each channel.

    You can add a scale bar via Analyze<Tools<Scale Bar.
    By changing the value of “Width in 〇〇:”, you can set it to whatever length you like.

    To save the processed image, use File<Save as and specify the file format.
    For some reason images come out white when saved as Tiff, so I recommend PNG or JPEG.

    And here is the finished image.

    You can find the link to Fiji here.

  • I Don’t Really Know What I’m Doing, But I Want to Program in Python! (Part 1)

    I Don’t Really Know What I’m Doing, But I Want to Program in Python! (Part 1)

    When you start learning programming, I think the first hurdle is figuring out where to begin.
    You search online, but then what? And what software are you supposed to use to write the code?

    I struggled with exactly that myself.

    There are broadly two kinds of tools for writing programs.
    One is interactive, and the other is script-based. (I’m putting it this way for clarity; I’m not entirely sure it’s the technically correct terminology…)

    With the interactive type, you type one line and get one response back
    —you write and run the program line by line, over and over.

    The script-based type is more like writing a whole essay and then getting feedback on it—you run the entire program at once.
    What most people picture when they think of a program is the script-based type, which looks like a long list of incomprehensible code.

    But when you decide to write a script-based program, the problem becomes: which software do you actually use?

    On top of that, beginner-level programming lessons often use the interactive style, and then at the intermediate level you’re suddenly writing scripts—yet what to write them in is often left unstated, or differs completely from book to book.

    For the interactive style, you use something already built into your computer, like Command Prompt or Terminal, and get started by typing “Python”.

    But what do you write script-based programs in?

    Most script-based programs are written in an IDE (integrated development environment). (When you’re stuck, searching for “Python IDE recommendations” turns up plenty of articles.)

    The ones I normally use for writing script-based programs are
    Jupyter Notebook and PyCharm.
    (Apparently some people pronounce “Jupyter” as “joo-pih-ter” and others as “joo-py-ter”.)

    I use Jupyter Notebook for statistical analysis and plotting graphs, and PyCharm for controlling hardware and for more complex programs.

    Let me explain what each one is like.

    First, Jupyter Notebook.
    It comes bundled when you download Anaconda.
    When you launch Jupyter Notebook, a browser such as Safari or Firefox opens first.

    Then a listing of the files on your computer appears.
    Open the folder you want, and click “New” in the upper right.
    Then click Python3, and a screen like the image below opens.
    Saving this file gives you a *.ipynb file.

    You write code into individual cells, and by clicking the RUN button at the top you can execute the program one cell at a time.

    Being able to run code cell by cell is a huge advantage when working with graphs and statistics.
    That’s why I use it so often.

    I use PyCharm for opening *.py files.
    Note that the two tools open different types of files.

    For PyCharm, please refer to other sites.
    (I haven’t used it much yet, so I’d like to cover how to use it in detail in a future post.)

    The Anaconda site is here

    The Jupyter Notebook site is here

    The PyCharm site is here
    For the download, choose the gray Community edition rather than Professional—that’s the free one.
    I’d recommend downloading that one to start with.

    Since I’ve been using Jupyter Notebook a lot lately, I plan to keep posting updates as notes on my own learning and for anyone who wants to learn programming.

  • Can’t remember where the screws go?! Solved with a clever idea ☆彡

    Can’t remember where the screws go?! Solved with a clever idea ☆彡

    When you swap a PC’s HDD for an SSD, reapply thermal paste, or try to fix a broken appliance or piece of furniture yourself, it’s all too easy to lose the screws.

    Once you lose a screw, you have to buy a replacement at a hardware store, and finding one that fits exactly is no easy task.
    I lost a screw myself when I tried to repair a Switch Pro Controller, and ended up having to go buy one.

    In recent years, electronic components circulating in the Chinese market have become available through AliExpress, Wish, and similar sites, and junk items are now easy to pick up on flea market apps like Mercari. As a result, far more people are trying their hand at repairs themselves.
    With COVID keeping people at home for longer stretches, I think this trend has only accelerated.

    Still, keeping track of screws is a basic part of fixing anything—and, I’d argue, one of the most important.
    So I’d like to share how I manage screws when repairing junk items.

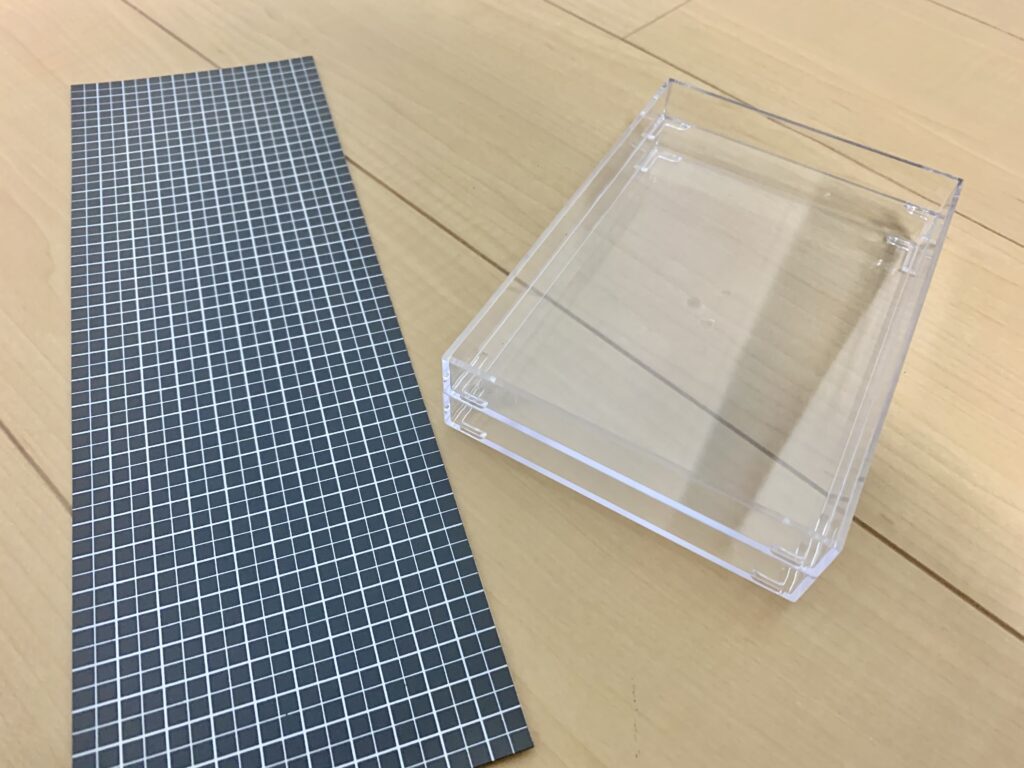
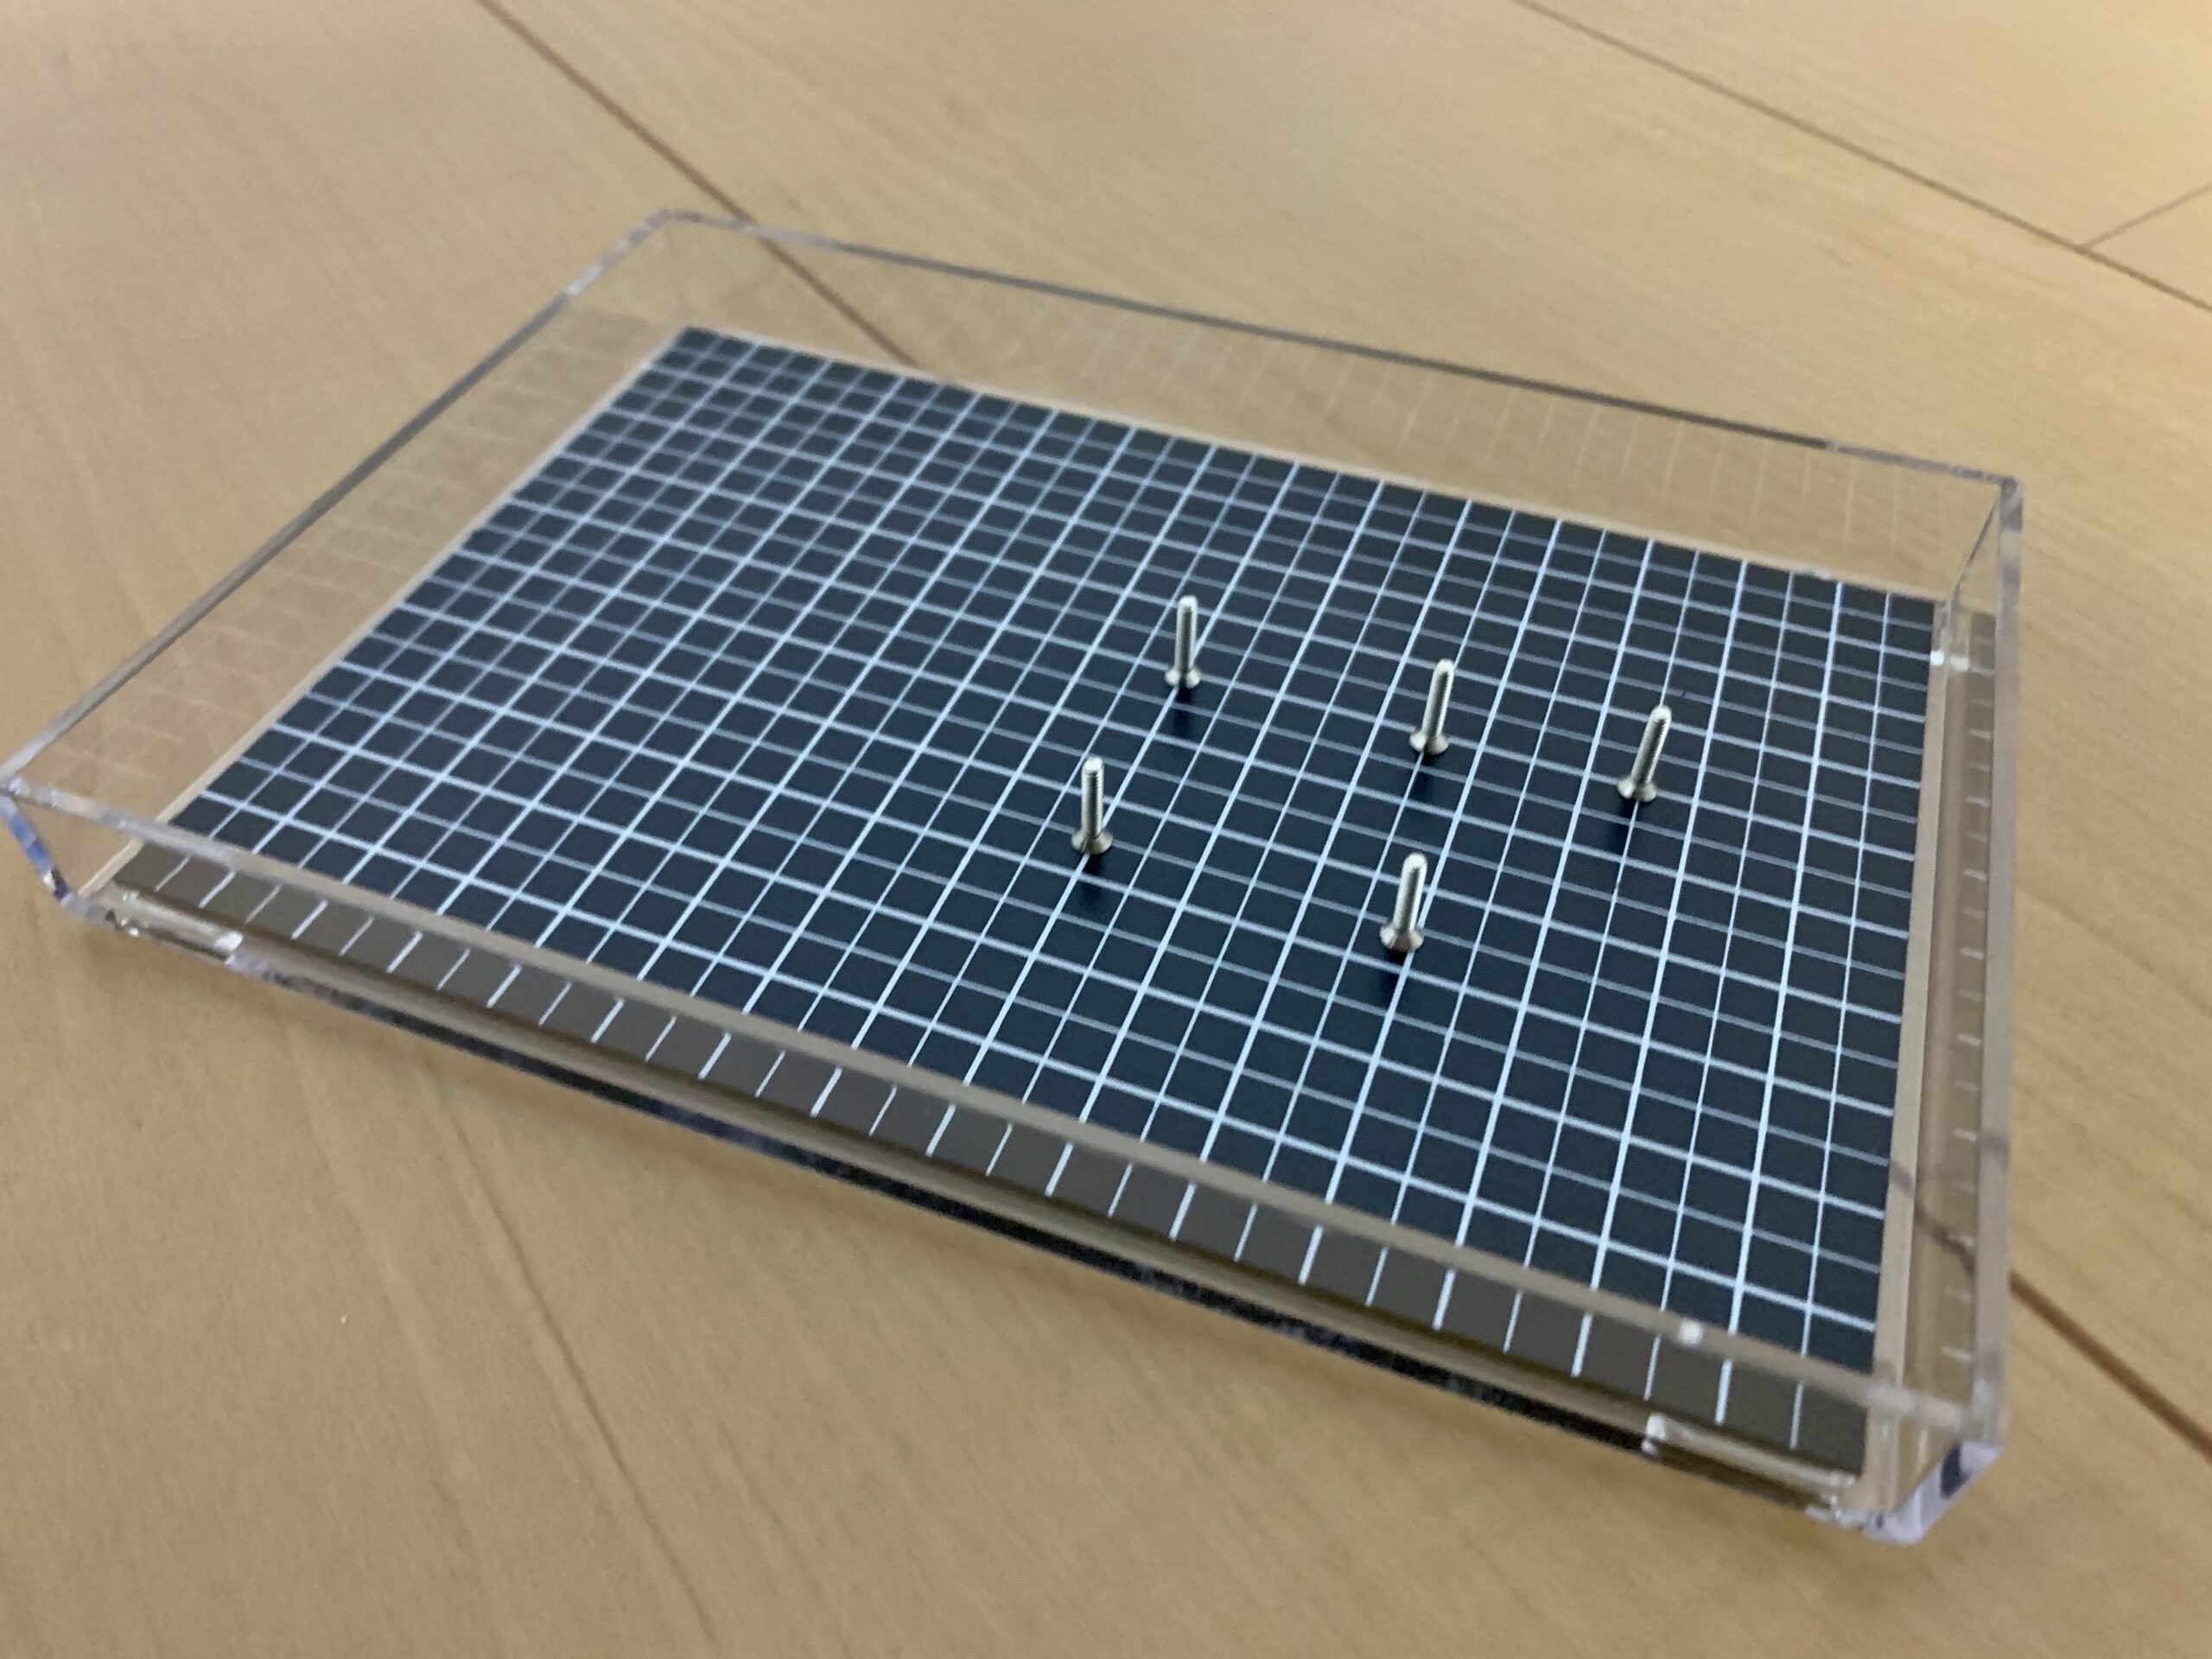
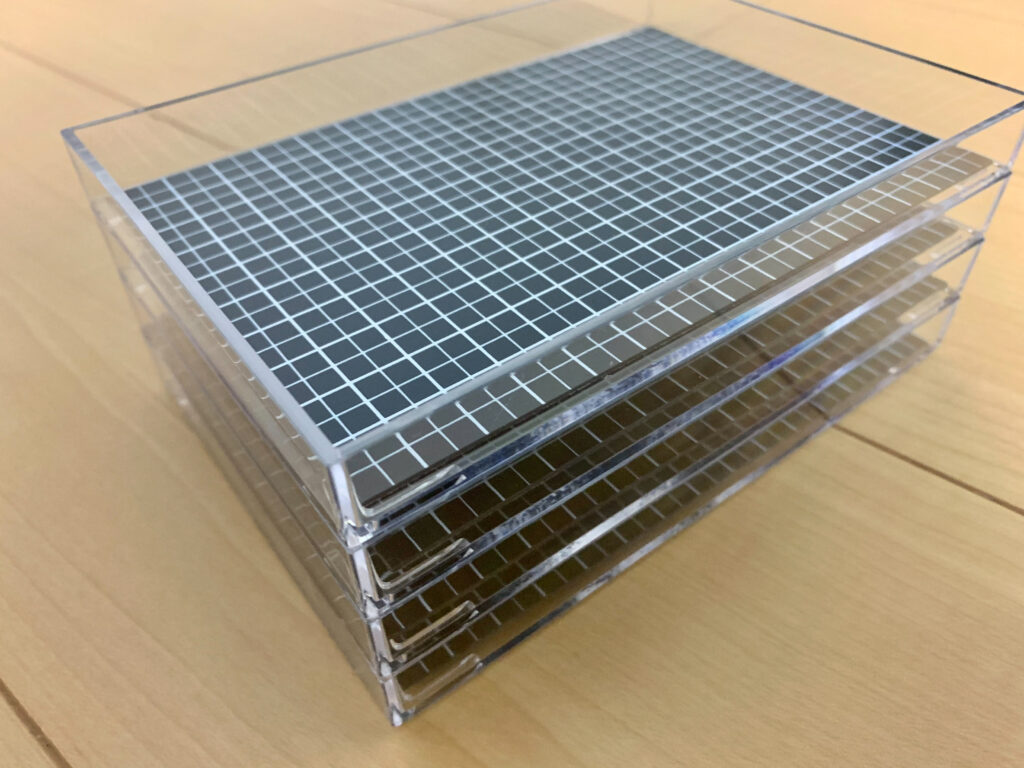
    You can make this with a magnetic sheet with an adhesive backing and a clear tray, both available at a hundred-yen shop.
    When I bought mine, the magnetic sheets were in the stationery section and the clear trays were in the storage section.

    Just cut the magnetic sheet to a suitable size and stick it on—that’s all there is to it.

    Stackable trays work even better: stacking them in the order you disassembled the device makes it easy to tell which screws came from where.
    Being able to keep small parts alongside the screws is another selling point.

    It’s easy to put together, so give it a try.

  • Reflections After a Month of Studying Programming

    The thing I feel most strongly while learning to program is that I have no idea whether I’m actually getting any good at it.

    For a long time I thought programming was something like English: that as I studied, I would gradually be able to write it as fluently as a language.
    In practice, though, it never really felt like that was happening.

    Programming feels like something you study when you’re forced to by necessity, which is to say you never really pick it up unless you use it.
    In my own case, I had analysis results from DeepLabCut, but the data were so massive that I needed to find some way to turn them into easy-to-read graphs.

    You can certainly make graphs in Excel, but with data this large it took forever just to open the file.
    So I decided to use Python to process the data and plot it, and set about writing the program while learning as I went.

    Once I started writing code, I found that writing the code itself wasn’t all that hard—what was hard was searching Google for the specific operation I wanted to do.
    It was a constant cycle of figuring out what processing I wanted, looking up code that would do it, and typing it in.

    Given all this, going back to my earlier point that programming isn’t quite like a spoken language: it’s more like always talking with a Japanese-English dictionary in hand. You can do just about anything if you spend enough time on it, but experience is what changes how fast you can look things up and how elegant your code becomes.

    Also, the code you write yourself becomes an asset—I often find myself copying and pasting my own code and tweaking it slightly when I need to do something similar.

    I’ve only just started programming and I’m something of a bandwagon type, so maybe I’m not really in a position to hold forth on this, but I hope it’s useful to anyone thinking of starting out.

  • How to Install DeepLabCut 2.3 [Updated December 2023]

    How to Install DeepLabCut 2.3 [Updated December 2023]

    In this post, I’ll walk through how to install DeepLabCut.

    Reference sites
    ・Japanese-language pages
    https://qiita.com/auditorycortex/items/1b3a55101cddf09553b2
    ↑Very clear. Following this alone should get you there.

    https://note.com/sakulab/n/n9caeb32d74d6
    ↑Includes screenshots

    DeepLabCut homepage
    GitHub

    How to install

    Environment
    ・Windows 10
    ・Confirmed working on NVIDIA 2060 SUPER, NVIDIA 1080 Ti, and NVIDIA 3080
    (did not work on NVIDIA 1060 SUPER)
    ・DeepLabCut 2.1
    ・Latest NVIDIA driver
    ・Anaconda3
    ・Python 3.8
    ・CUDA 11.8
    ・tensorflow-gpu 2.5

    Steps
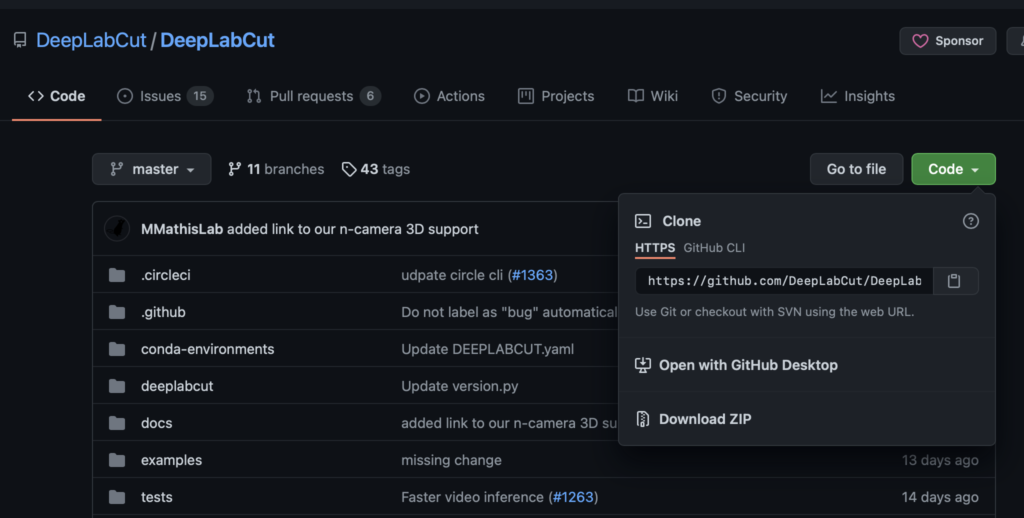
    First, download the master files from the GitHub page.

    You can download it via “Download ZIP” under Code.

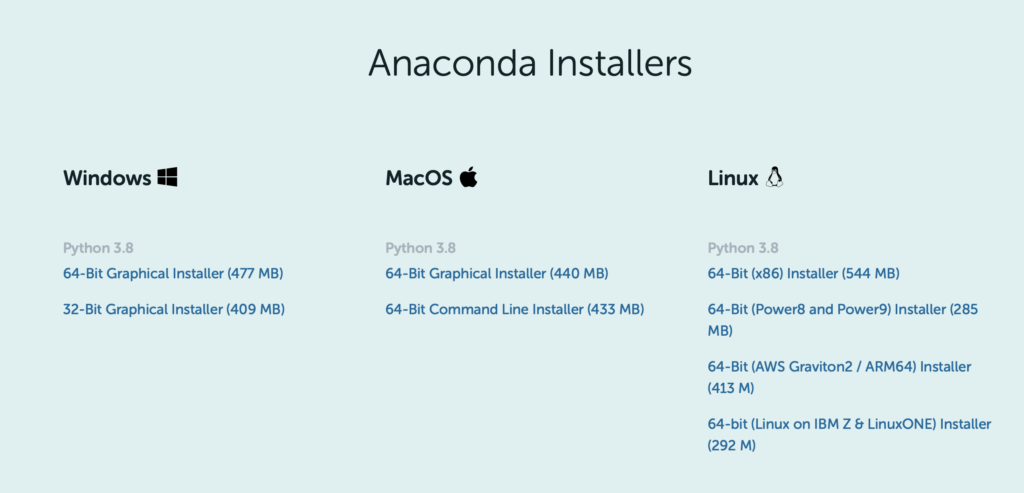
    Next, download and install the Windows 10 64-bit version from the Anaconda site.

    Install the NVIDIA driver. (Skip this if it is already installed.)

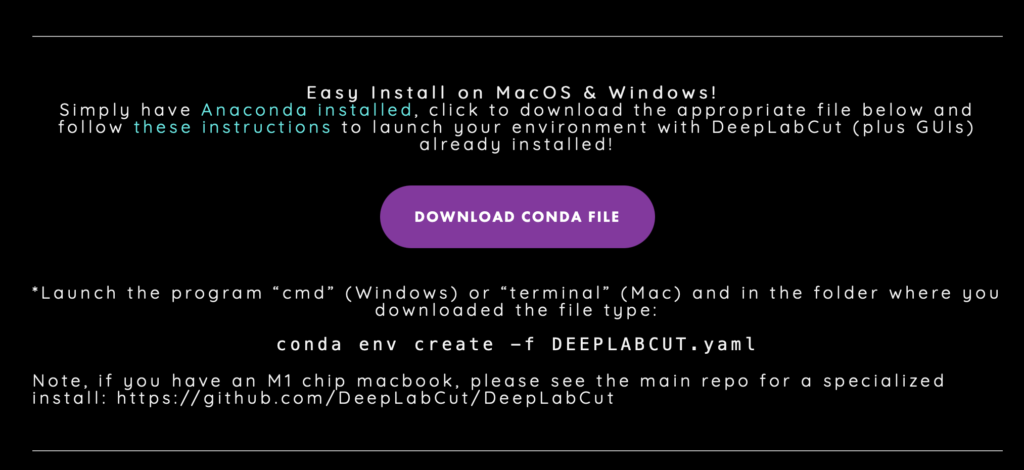
    Scroll down on the DeepLabCut site, click “DOWNLOAS CONDA FILE” on the right, and
    download DEEPLABCUT.yaml.

    Create a DeepLabCut folder somewhere on your PC (the Desktop or a directory on the C drive is recommended), and create an environment folder inside it.
    Then place the DEEPLABCUT.yaml file you just downloaded into that folder.
    This is a matter of personal preference, but I like to keep environment files in one fixed place, so this is how I do it.

    Launch Anaconda Prompt as administrator. (A terminal-like window full of white text on black, similar to the command prompt, will appear.)
    Anaconda Prompt is installed together with Anaconda, so you should be able to find it in your list of installed applications.

    Now build a virtual environment using the DEEPLABCUT.yaml file you downloaded.
    In Anaconda Prompt, type

    conda env create -f C:(DLC-GPU.yamlファイルの場所)DEEPLABCUT.yaml

    and run it.
    You can check the location of the DEEPLABCUT.yaml file in the file’s properties, so look it up there and enter it.

    When you run this command, it will download various packages.
    After that, activate the virtual environment you created.

    conda activate DEEPLABCUT

    The prompt should change from (base) to (DEEPLABCUT).
    If you get that far, you’re good for now.

    Next, install CUDA and cuDNN.

    conda install -c conda-forge cudnn

    This will download suitable versions of the CUDA toolkit and cuDNN for you.

    Then enter the following four commands to complete the installation.

    pip install numpy
    pip install deeplabcut
    pip install imgaug
    pip install torch

    Update DeepLabCut, and the installation is complete.

    pip install --upgrade deeplabcut

    Once you’ve made it this far, try launching it.

    conda activate DEEPLABCUT
    python -m deeplabcut

    Entering this will launch the DeepLabCut GUI.

    What to do when DeepLabCut won’t run on the GPU

    Sometimes you start training and think, “Huh? Isn’t this slow?”
    That’s because DeepLabCut is running on the CPU when you meant to run it on the GPU.

    A common cause is a version mismatch among CUDA, cuDNN, and tensorflow.

    Packages like tensorflow keep getting updated to newer versions,
    so things occasionally stop working.

    For the latest version information, please check DeepLabCut’s GitHub page.

    That covers the installation process.
    In upcoming posts, I’ll explain how to actually use it.

    Bonus

    For those who aren’t sure which computer to buy, I’ve started offering PC purchase consultations on Coconala!

    あなたの要望に合わせてパソコンを選び、提案します パソコン選びに困っている方々へ!様々な目的に対応できます!

    I’ve picked out and advised on computers so often that many friends told me I should charge for it.
    That inspired me to give it a try!

    I’ll recommend a machine that fits both your intended use and your budget.
    I have particular experience choosing and working with computers for machine learning.

    And if you’d like, I can also advise you on what to look for when buying a computer in the future.

    Machines I’ve helped choose so far include lab analysis workstations, everyday work computers, game-streaming rigs, laptops for incoming university students, CAD-capable machines for architecture students, and simple all-purpose computers.

    I use both Mac and Windows, so I can discuss and recommend either!

    Please feel free to make use of it.

    Addendum 1

    I’ve also written an article on how to install “SLEAP,” another behavior-tracking tool like DeepLabCut.

    SLEAP is every bit as capable as DeepLabCut, so do give it a try.

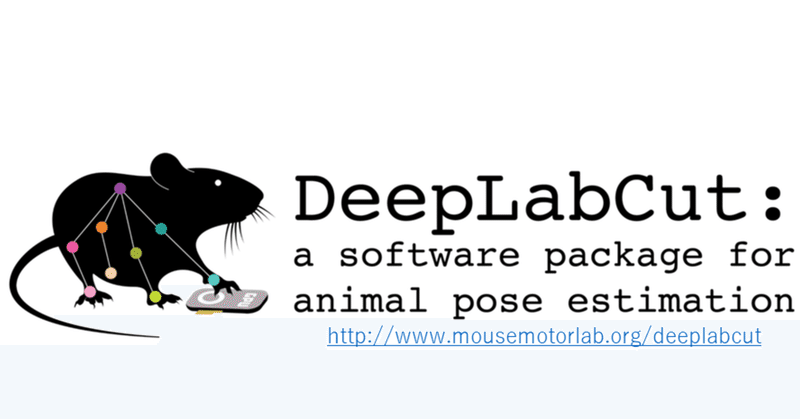
  • DeepLabCut: A Deep Learning-Based Behavior Analysis Tool

    DeepLabCut: A Deep Learning-Based Behavior Analysis Tool

    (The image above links to the paper.)

    Behavioral analysis is a crucial experimental approach in biology, and accurate quantification of behavior is especially indispensable for understanding the brain.

    Traditionally, high-accuracy pose estimation has been achieved by attaching markers (such as sensors) to the subject (a person or a laboratory animal).
    However, sensors get in the subject’s way, which can alter its behavior or restrict its movements.

    One marker-free alternative is to fit a skeleton model, but developing such models is time-consuming and has to be done on a large scale.
    There are also image-based pose estimation systems, but these generate enormous amounts of data, which again makes them very difficult for a single laboratory to run given the equipment required.

    With DeepLabCut, anyone with a single computer can perform pose estimation very easily.
    Using deep learning-based image recognition, you can track any body parts you choose without markers.

    Because the labeling is learned by a deep network, you can analyze recorded videos without correcting them beforehand.
    In other words, tracking works even if the lighting across the field of view is uneven or the image is somewhat distorted depending on the camera angle.

    The page of the laboratory that developed DeepLabCut is here.
    The GitHub repository is here.

    From actually using DeepLabCut, I found that the computer used for analysis needs a GPU (graphics card) with at least 8 GB of memory.
    In gaming PC terms, that means a mid- to high-end GPU, so comfortable analysis is not possible on an everyday laptop.

    That said, even without such a high-spec machine, you can run the analysis on a virtual GPU using Google Colab.
    I haven’t tried it yet, though…

    In practice, I found the plotting accuracy to be very high.
    However, analysis often fails when the background differs from that of the training data, so it is best to assume the exact setting you want to analyze and use training data recorded under conditions as close to it as possible.

    The paper shows that plotting accuracy improves further when you label not only the few points you are interested in but the whole subject, including a rough skeleton, even for parts you will not use in the analysis.
    In addition, if the results are unsatisfactory after training and analysis, you can remove the problematic frames or add new training data, allowing you to actively refine the model.

    DeepLabCut itself is very user-friendly, and anyone can use it easily.
    Why not give it a try in your own analyses?

    I’d like to write about how to install and use DeepLabCut in future posts.